Oven Not Heating? Complete Repair Guide for Gas & Electric Ovens (2025)
Is your oven not heating properly, ruining your meals and disrupting your cooking routine? This common appliance problem affects thousands of Toronto households, but many heating issues can be diagnosed and fixed with the right knowledge.
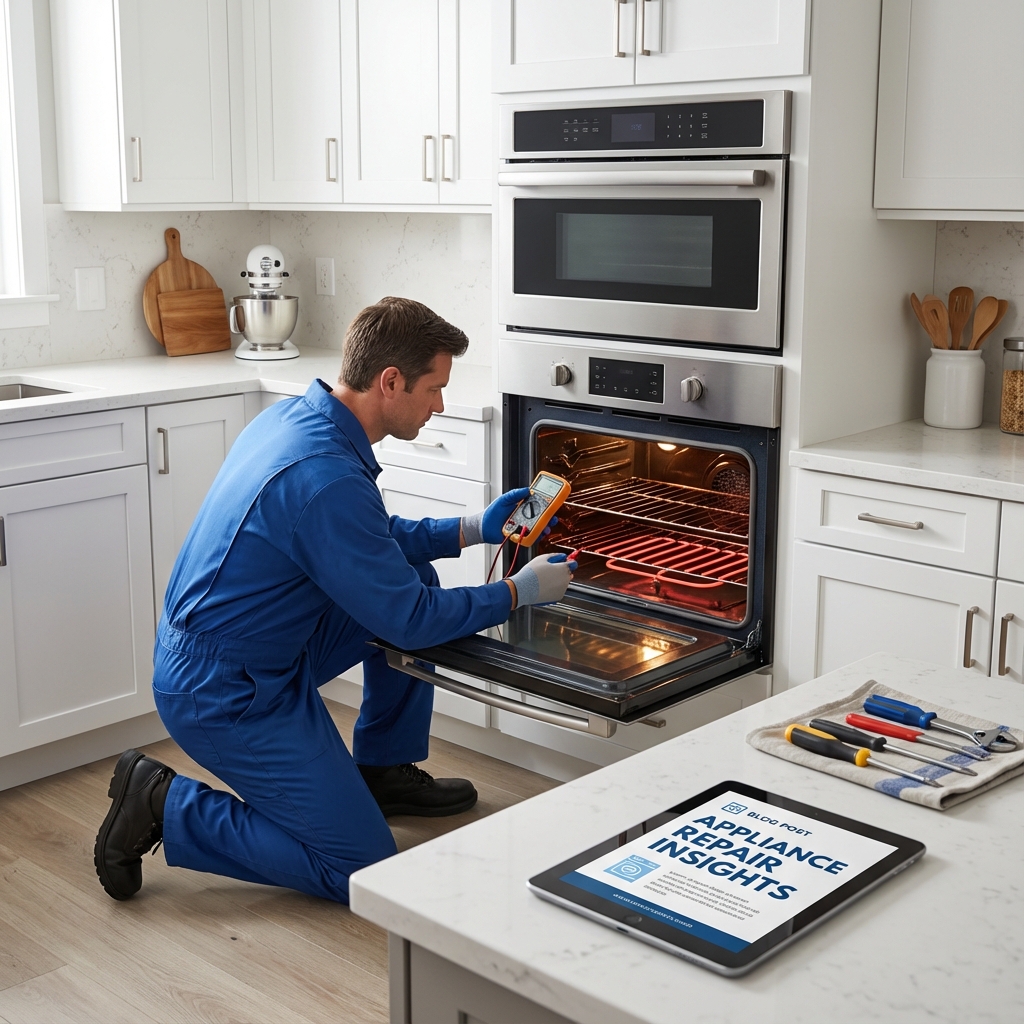
At JK Appliances Toronto, we've repaired over 5,000 ovens across the GTA. Here's our comprehensive guide to help you troubleshoot and fix oven heating problems safely and effectively.
Quick Answer: Oven not heating properly? Learn how to diagnose and fix common heating issues in gas and electric ovens. Our Toronto experts share proven troubleshooting steps to save you money on repairs. This is a common issue that can usually be resolved with proper troubleshooting. If the problem persists, professional diagnosis is recommended.
Quick Diagnosis: Signs Your Oven Isn't Heating
Immediate Warning Signs:
- Oven takes longer than usual to preheat
- Temperature fluctuations during cooking
- Food not cooking evenly or thoroughly
- Oven light works but no heat
- Error codes on digital display
- Gas smell without ignition (gas ovens)
- Electric coils not glowing red (electric ovens)
Safety Alert: If you smell gas and your oven won't ignite, turn off gas supply immediately and contact JK Appliances for emergency service.
Electric Oven Not Heating: 6 Common Causes
Cause 1: Faulty Bake or Broil Element
The Problem: Heating elements burn out over time, preventing your electric oven from heating properly.
Visual Inspection Signs:
- Elements don't glow red when heating
- Visible cracks or blisters on element
- Dark spots or holes in element
- One element works, other doesn't
DIY Testing Steps:
- Turn oven to bake mode at 350°F
- Observe both elements - should glow red within 2 minutes
- Check for even glow across entire element
- Test with multimeter for continuity (10-50 ohms normal)
Replacement Cost: $75-150 for parts + $100-200 labor at JK Appliances Toronto.
Cause 2: Temperature Sensor Malfunction
The Problem: Faulty temperature sensors give incorrect readings, causing heating inconsistencies.
Sensor Testing:
- Locate sensor probe (usually rear oven wall)
- Check resistance with multimeter at room temperature (1000-1100 ohms at 70°F)
- Inspect for damage or loose connections
- Test temperature accuracy with separate oven thermometer
Professional Tip: Temperature sensors should increase resistance as temperature rises.
Cause 3: Control Board Failure
The Problem: Electronic control boards regulate heating cycles and can malfunction.
Control Board Symptoms:
- Inconsistent temperature control
- Digital display errors
- Oven won't start heating cycle
- Temperature settings don't respond
- Unusual beeping or error codes
Professional Repair Required: Control board diagnosis needs specialized equipment available at JK Appliances.
Gas Oven Not Heating: 5 Primary Causes
Cause 1: Faulty Gas Igniter
The Problem: Gas igniters weaken over time, preventing proper gas ignition in your oven.
Igniter Testing:
- Remove oven racks for clear view
- Set oven to bake and observe igniter
- Look for bright orange glow (should appear within 90 seconds)
- Listen for gas valve clicking after igniter glows
- Check for cracks in igniter housing
Warning Signs of Bad Igniter:
- Glows but gas doesn't ignite
- Takes more than 90 seconds to light
- Weak or dim glow
- Visible cracks in igniter
Replacement Cost: $120-200 including labor.
Cause 2: Gas Supply Problems
The Problem: Inadequate gas supply prevents proper oven heating.
Gas Supply Checklist:
- Verify gas valve is fully open
- Check other gas appliances (stove, water heater)
- Inspect gas line connections for leaks
- Ensure proper gas pressure (professional test required)
- Check for gas line obstructions
Safety First: Only certified gas technicians should repair gas lines. Contact JK Appliances for safe service.
Cause 3: Clogged Burner Ports
The Problem: Food debris and grease can clog gas burner ports, affecting heat distribution.
Cleaning Steps:
- Remove oven racks and bottom panel
- Locate burner assembly (usually bottom of oven)
- Clean ports with thin wire or toothpick
- Use compressed air to blow out debris
- Reassemble carefully ensuring proper alignment
Universal Oven Problems (Gas & Electric)
Door Seal Issues
The Problem: Damaged door seals allow heat to escape, reducing oven efficiency.
Door Seal Inspection:
- Visual check for tears or damage
- Paper test: Close paper in door - should hold firmly
- Feel for heat escaping around closed door
- Check door alignment and hinge operation
Temporary Fix: Clean seals thoroughly; replace if damaged.
Thermostat Calibration Problems
The Problem: Miscalibrated thermostats cause temperature inaccuracies.
Calibration Testing:
- Use separate oven thermometer as reference
- Set oven to 350°F and monitor actual temperature
- Allow 20 minutes for temperature stabilization
- Compare readings - should be within 25°F
- Adjust calibration if your oven allows (check manual)
When to Call JK Appliances Toronto
Professional Service Required:
- Gas line repairs or adjustments
- Control board replacement
- Electrical wiring issues
- Multiple simultaneous problems
- Safety concerns with gas smells
- Warranty repair needs
Emergency Situations:
- Strong gas odor without ignition
- Electrical sparking or burning smells
- Oven overheating beyond set temperature
- Carbon monoxide concerns
Oven Maintenance to Prevent Heating Problems
Weekly Maintenance:
- Clean spills immediately
- Check door seal condition
- Verify temperature accuracy
- Remove food debris
Monthly Tasks:
- Clean oven interior thoroughly
- Inspect heating elements
- Check gas connections (visual only)
- Test all oven functions
Annual Professional Service:
- Complete safety inspection
- Gas pressure testing
- Electrical connection check
- Calibration verification
- Ventilation system cleaning
Cost Analysis: Repair vs Replace
Common Repair Costs in Toronto:
- Element replacement: $175-300
- Igniter replacement: $150-250
- Temperature sensor: $120-200
- Control board: $300-500
- Complete tune-up: $150-200
Consider Replacement When:
- Repair costs exceed 50% of new oven price
- Multiple major components failing
- Oven over 15 years old
- Repeated service calls needed
Brand-Specific Heating Issues
**Whirl
Common Questions People Ask
Q: Is it normal for my oven to heating repair guide? No, this is not normal behavior and indicates an underlying issue that should be addressed promptly to prevent further damage.
Q: Can I fix this oven problem myself? Some basic issues can be resolved with DIY troubleshooting, but complex problems require professional diagnosis to avoid safety risks and warranty issues.
Q: How much does professional oven repair cost in Toronto? Repair costs typically range from $150-$400 depending on the specific issue and parts needed. Our technicians provide free estimates before any work begins.
Q: How long does oven repair take? Most repairs are completed within 1-2 hours during a single visit. Some cases may require ordering specialty parts with a follow-up appointment.
Q: Should I repair or replace my oven? If your oven is less than 8 years old and repair costs are under 50% of replacement cost, repair is usually the better value. Our technicians can help you make the right decision.
Q: Do you offer same-day oven repair in Toronto? Yes! We offer same-day and emergency repair services throughout Toronto and the Greater Toronto Area for urgent issues.
Q: What brands of oven do you repair? We service all major brands including Bosch, Samsung, LG, Whirlpool, KitchenAid, GE, Maytag, Frigidaire, Miele, and more.
Q: Is oven repair covered by warranty? Many oven issues are covered under manufacturer warranty. We can help verify your warranty status and handle claim processing.
pool/KitchenAid Ovens:**
- Common igniter failures
- Control board issues after 5 years
- Temperature sensor problems
GE/Frigidaire Ovens:
- Bake element burnouts
- Door seal deterioration
- Thermostat calibration drift
Samsung/LG Ovens:
- Digital control malfunctions
- Heating element inconsistencies
- Sensor connectivity issues
Frequently Asked Questions About Oven Heating Problems
Q: Why does my oven take forever to preheat? A: Slow oven preheating beyond 15-20 minutes indicates component degradation or failures: Weak heating elements on electric ovens where elements glow dim orange/red instead of bright red-orange—element resistance increases with age reducing heat output (bake element replacement $75-150, broil element $80-175). Faulty gas igniter on gas ovens glowing weakly taking 90+ seconds to ignite gas valve—weak igniters draw insufficient current to open gas valve promptly ($120-200 igniter replacement). Failed oven temperature sensor sending incorrect readings to control board causing premature heating cycle shutdown before reaching target temperature ($120-200 sensor replacement). Poor door seal allowing heat escape requiring continuous heating to maintain temperature—test with dollar bill in closed door, should hold firmly ($150-300 seal replacement). Clogged burner ports on gas ovens restricting gas flow reducing flame intensity. Low gas pressure from supply line issues or regulator problems. Voltage drop on electric ovens from weak household wiring or shared circuits. Thermostat calibration drift where oven believes it reached temperature but actually 50-75°F below target. Diagnosis steps: Time preheat to 350°F with separate oven thermometer—should reach temperature in 12-15 minutes for gas, 15-18 minutes for electric. Observe element glow (electric) or flame color (gas)—bright indicates proper operation. Check for heat escaping around door. Professional repair often needed as weak components worsen gradually—what starts as slow preheat becomes no heat failure. Contact JK Appliances for accurate diagnosis and element/igniter replacement.
Q: Can I replace oven heating elements myself? A: DIY electric oven element replacement is feasible for mechanically inclined homeowners with proper safety precautions: Electric ovens: Element replacement is moderate DIY task—disconnect power at breaker (CRITICAL—verify with voltage tester), remove oven racks, locate element mounting screws (usually 2 screws at rear wall), carefully pull element forward exposing wire connections, photograph wire connections before disconnecting, disconnect wires (note positions), remove element, install new element matching wire positions exactly, secure mounting screws, restore power, test operation. Success requires matching exact element for your model—bring old element or model number to appliance parts store. Cost savings significant: DIY $50-75 (element only) vs professional $175-300 (parts + labor). However, Gas oven repairs are NOT DIY—gas components including igniters, valves, and burners require certified gas technicians per safety codes and legal requirements. Gas work risks explosion, fire, carbon monoxide poisoning from improper installation. Additionally, professional service recommended for electric ovens if: uncomfortable working with electricity (120V/240V circuits), warranty still active (DIY voids coverage), multiple components failing simultaneously suggesting underlying issues, or convection ovens with complex wiring. Safety warnings: Always disconnect power and verify with tester before touching any wiring, heating elements remain hot 30-45 minutes after use, incorrect wire connections cause control board damage ($300-500 additional repair), and some elements have fragile ceramic insulators requiring gentle handling. Professional installation through JK Appliances Toronto includes proper testing, warranty on parts/labor, and code-compliant work.
Q: How long should oven heating elements last? A: Oven heating element lifespan varies by type, usage, and care: Electric bake elements (bottom element) last 5-10 years averaging 2000-3000 hours of use—these run during every baking cycle experiencing most use and thermal stress. Electric broil elements (top element) last 8-15 years averaging 1000-2000 hours—used less frequently only during broiling and some baking cycles. Gas igniters have shorter lifespans at 3-7 years or 1500-2500 cycles—repeated thermal cycling from room temperature to 2000°F+ weakens ceramic housing and element deteriorates. Convection fan elements last 7-12 years with less thermal stress than bake elements. Factors reducing element life: Frequent high-temperature use (over 450°F) accelerates degradation, self-cleaning cycles (reaching 900°F) significantly stress elements—each self-clean cycle equals 10-15 normal baking cycles in wear, thermal shock from spills contacting hot elements causing immediate or gradual failure, and power surges/voltage spikes damaging element resistance wire. Signs of failing elements: uneven glow patterns when heating (dark spots indicate internal breaks forming), slow heating or inconsistent temperatures, visible cracks, blisters, or pitting on element surface, intermittent operation, and tripped breakers when element activated. Extending element life strategies: Avoid unnecessary self-clean cycles (spot clean instead when possible), allow oven to cool before wiping spills preventing thermal shock, use covers or foil to catch drips during cooking, install whole-house surge protection, and avoid repeatedly opening door during preheating cycling elements on/off rapidly. Most element failures are age-related unavoidable, budget for replacement every 5-7 years on frequently used ovens.
Q: Is it safe to use an oven that heats unevenly? A: Using ovens with uneven heating creates food safety risks and indicates component problems: Food safety concerns: Undercooked portions of meat/poultry present bacterial contamination risk (E. coli, Salmonella)—meat thermometer showing safe temperature in one spot doesn't guarantee entire dish cooked safely. Baked goods with raw centers despite cooked exteriors. Casseroles with cold spots harboring bacteria. Recommended approach: Discontinue use for temperature-sensitive foods (meat, eggs, dairy) until repaired, okay for low-risk foods (bread, vegetables) with close monitoring, always use food thermometer in multiple locations verifying temperatures. Underlying problems indicated: Failed convection fan not circulating heat evenly, weak or partially failed heating element heating only portions of oven, damaged or missing baffles in oven cavity disrupting airflow, door seal leaks allowing cold air intrusion on one side, temperature sensor malfunction providing inaccurate feedback to controls, or burner port clogs (gas ovens) creating uneven flame distribution. Repair urgency: High priority—uneven heating worsens gradually, indicates developing failure potentially leading to complete heating loss or safety hazards (gas leaks, electrical shorts). Temporary workarounds: Rotate pans 180° halfway through cooking, use center rack position only, add 25°F to set temperature compensating for cool spots, extend cooking times 10-20%, but these are temporary—proper repair required. Professional oven repair from JK Appliances identifies root cause through systematic testing and resolves uneven heating permanently.
Q: What does it mean if my gas oven glows but won't ignite? A: Gas oven igniter glowing without ignition indicates specific igniter or valve problems: Normal ignition sequence: Igniter begins glowing orange within 30-45 seconds of oven activation, igniter reaches full bright orange-white glow drawing 3.2-3.6 amps, this current opens gas valve electromagnetically after 60-90 seconds, gas flows and ignites from hot igniter, flame establishes and igniter continues glowing maintaining valve open. Failure when glowing without ignition: Weak igniter drawing only 2.5-3.0 amps insufficient to open gas valve—igniter glows but can't generate current needed ($120-200 igniter replacement most common fix). Failed or sticky gas valve not opening despite proper igniter current—valve solenoid burned out or valve mechanically stuck ($200-350 valve replacement). Gas supply issue where gas valve tries to open but no gas pressure at oven (main valve closed, regulator failed, supply line kinked). Incorrect igniter installation after previous repair—wrong model igniter for your valve type. Safety gas valve lockout from previous ignition attempts detecting fault. Diagnosis: Measure igniter current with ammeter during glow—below 3.0 amps indicates weak igniter. Listen for gas valve click when igniter reaches full glow—clicking indicates valve attempting to open. Smell for gas at burner when igniter glowing—gas smell with no ignition suggests igniter failing to ignite but valve opening (dangerous—shut off immediately). SAFETY CRITICAL: If smelling gas without ignition, turn oven off, shut gas supply valve, ventilate area, call certified gas technician immediately—this indicates gas leak hazard. Never attempt multiple ignition cycles with gas odor present. Only licensed technicians should repair gas components legally and safely.
Q: Why does my electric oven heat on bake but not broil? A: Broil element failure while bake works indicates isolated component problem: Each heating element (bake on bottom, broil on top) operates independently with separate electrical circuits and control relays—failure of broil element or its control circuit doesn't affect bake operation. Common causes: Burned-out broil element (most common)—visual inspection shows cracks, blistering, or breaks in element ($80-175 replacement). Failed broil relay on control board—relay contacts welded open preventing power to broil element even when selected ($300-500 control board replacement, sometimes repairable). Broken wire connection specifically to broil element—vibration or corrosion disconnects power. Faulty broil selector switch on control panel (older models with mechanical controls). Tripped thermal cutoff protecting broil circuit from overheating—may reset when oven cools or may require replacement. Diagnosis steps: Visually inspect broil element for obvious damage when oven cool and powered off. Test element continuity with multimeter—should read 10-50 ohms, infinite reading confirms open circuit element failure. Check voltage at element terminals when broil selected—240V present but no heating indicates element failure, no voltage indicates control/wiring issue. Broil elements typically last longer than bake elements (8-15 years vs 5-10 years) but fail from same mechanisms—thermal stress, age, contamination. DIY broil element replacement feasible following same procedure as bake element: disconnect power, remove mounting screws, disconnect wires (photograph first), install new element, reconnect, test. Professional service recommended if control board suspected—board-level diagnostics require specialized knowledge and equipment available at JK Appliances repair service.
Q: Can a tripped breaker cause oven heating problems? A: Yes, electrical issues including breaker trips cause various oven heating symptoms: Complete power loss: Both breakers tripped (ovens typically use double-pole 40-50 amp breaker) results in completely dead oven—no lights, no display, no heating. Partial power loss: Single pole tripped on double-pole breaker causes one 120V leg lost—oven lights and controls may work (running on remaining 120V) but heating elements won't operate (requiring full 240V). This confuses homeowners thinking oven has power since lights work. Recurring trips indicate problems: Breaker tripping once during self-clean cycle (high load) may be normal. Repeated trips during normal operation indicate: Failed heating element with internal short to ground, damaged element touching oven frame creating short circuit, deteriorated wire insulation in oven causing short, moisture infiltration in control board or wiring, or undersized/worn breaker unable to handle oven's legitimate current draw. Diagnosis and resolution: Note when tripping occurs—immediately upon heating = element short, after 5-10 minutes = overload from multiple issues, random = intermittent short. Inspect heating elements for obvious damage, corrosion, or contact with frame. Check breaker size matches oven requirements (placard on oven frame, typically 40-50 amps). Test element resistance—should show 10-50 ohms to element, infinite ohms to ground (any reading to ground indicates dangerous short). Have electrician verify household wiring adequate for oven load and breaker operating properly. Safety critical: Frequent breaker trips indicate electrical fault creating fire/shock hazard—discontinue oven use and call professional immediately. Never bypass breaker or use larger breaker than specified. Professional diagnosis from certified appliance technician with electrical expertise identifies fault safely and ensures code-compliant repair.
Q: What should I do if I smell gas but my oven won't light? A: Gas odor without ignition is EMERGENCY situation requiring immediate action: IMMEDIATE STEPS: Turn oven off immediately, open windows creating cross-ventilation, do NOT operate any electrical switches, outlets, or create sparks, turn off main gas supply valve to home if accessible, evacuate family and pets from home, call gas company emergency line from outside (natural gas) or propane supplier emergency line (propane), call fire department if strong odor, and do NOT re-enter until professionals declare safe. After professional all-clear, diagnosis needed: Failed igniter attempting ignition but too weak to ignite gas—gas flows but doesn't ignite creating accumulation. Delayed ignition where gas flows several seconds before igniting causing mini-explosion sound (very dangerous—discontinue use immediately). Gas valve malfunction flowing gas continuously even when oven off. Burner position/alignment issues where gas flows away from igniter preventing ignition. Blocked burner ports allowing gas escape without proper combustion. Safety valve failure. Proper ignition sequence: Igniter glows 60-90 seconds before gas flows, gas should ignite within 1-2 seconds of flowing, flame establishes steadily, no gas odor should ever be present. Any gas smell indicates malfunction requiring professional service. NEVER: Attempt DIY gas oven repairs, try "lighting manually" with match or lighter (explosion risk), continue using oven hoping problem resolves itself, or ignore intermittent gas smells. Professional service: ONLY certified gas technicians legally permitted to repair gas appliances in Canada. JK Appliances employs licensed gas fitters available for emergency service. Gas oven repairs $150-400 typically including igniter/valve replacement. Small gas smell saves lives—always err on side of caution calling for professional help rather than risking explosion/fire/carbon monoxide poisoning.
Q: Why is my oven temperature inaccurate by 50+ degrees? A: Significant oven temperature calibration errors indicate sensor or control failures: Test actual temperature with separate oven thermometer placed on center rack—allow 20 minutes stabilization after preheat, compare to set temperature. Causes of inaccuracy: Failed temperature sensor (RTD probe) sending incorrect resistance readings to control board—sensor should read 1080-1120 ohms at room temperature (70°F), increasing linearly with temperature. Faulty sensor reads high causing oven to stop heating early (oven 50°F cooler than set), or reads low causing overheating (oven 50°F+ hotter). Control board calibration drift or failure—electronic controls lose calibration over time or component degradation creates errors. Mechanical thermostat failure (older ovens)—bimetallic thermostat loses calibration or mercury switch fails. Poor sensor placement or contact—sensor must contact oven cavity properly for accurate reading. Voltage fluctuations affecting electric oven heating element cycling. Solutions based on error severity: 25°F or less error: Many ovens allow calibration adjustment via hidden menu or physical adjustment screw—consult manual for calibration procedure. 25-50°F error: Likely sensor drift—replace temperature sensor ($120-200 repair). 50°F+ error or fluctuating wildly: Control board or sensor failure requiring professional diagnosis. Interim workaround: Use oven thermometer and adjust set temperature compensating for error (set 375°F to achieve actual 350°F if running 25°F cool). However, permanent repair recommended as errors typically worsen, affect cooking results, and may indicate broader control system problems. Accurate temperature critical for baking chemistry—bread, pastries, and cakes fail with incorrect temperatures. Professional oven calibration and sensor service restores accurate temperature control.
Q: Can I use my oven if only one element works? A: Using oven with partial heating capability is possible short-term with limitations and workarounds: Bake element only (broil failed): Fully functional for all baking, roasting, and most cooking. Cannot broil (top browning/crisping). Workaround: If top browning needed, use higher rack position closer to bake element heat rising, or finish dishes under separate broiler/toaster oven. Most home cooking doesn't require broil function—this is low-priority repair. Broil element only (bake failed): Very limited functionality—can broil or use as slow warmer. Cannot properly bake as heat concentrated at top not surrounding food. Not recommended for regular cooking. High-priority repair needed. Convection fan failed (elements work): Standard baking fully functional. Loss of convection benefits (faster cooking, even heating, energy efficiency). Can cook normally adding 25°F temperature and 10-15% more time compensating for no fan circulation. Medium-priority repair. Safety and performance considerations: Operating on single element doesn't damage oven electrically—circuits independent. However, food quality suffers from uneven heating, cooking times become unpredictable, and energy efficiency decreases. Extended use this way stresses working element potentially shortening its life. Temperature accuracy decreases with only one heat source. Repair timing: If broil failed, schedule repair at convenience within 1-2 months. If bake failed, repair urgently within 1-2 weeks as severely limits oven usefulness. If both elements weak or intermittent, suggests broader electrical/control issues requiring immediate professional diagnosis. Single element operation acceptable temporarily but not long-term solution—schedule professional oven element repair with JK Appliances restoring full heating capability and optimal performance.
Q: How much does professional oven heating repair cost in Toronto? A: Oven repair costs in Toronto vary by component and oven type (gas vs electric): Diagnostic fees: $80-120 typically, waived when proceeding with repair at most companies including JK Appliances. Electric oven repairs: Bake element replacement $175-300 (part $75-150, labor $100-150), broil element replacement $180-325 (part $80-175, labor $100-150), temperature sensor $120-200, control board replacement $300-500 (part $150-300, labor $150-200), door seal $150-300, thermostat $100-200. Gas oven repairs: Igniter replacement $150-250 (most common repair), gas valve $200-350, burner assembly cleaning $120-180, thermocouple $100-180, control board replacement $300-500, safety valve $150-250. Brand variations: Standard brands (Whirlpool, GE, Frigidaire) generally lower parts cost. Premium brands (Samsung, LG, Bosch) moderately higher. Luxury brands (Miele, Wolf, Viking) significantly higher parts cost but justified by build quality. Cost vs replacement decision: Repair economical when single component failure on oven under 12-15 years old, repair under $400, and oven otherwise functional. Consider replacement when repair exceeds $500, oven over 15 years old, multiple simultaneous failures, or desire for modern features (convection, smart controls, improved efficiency). At JK Appliances Toronto: Transparent upfront pricing after diagnosis, price-match competitive quotes, same-day service throughout GTA, 90-day warranty on parts and labor, honest recommendations on repair versus replacement prioritizing customer value. Emergency weekend service available for urgent situations. Most oven heating repairs complete in single 1-2 hour visit with parts typically in stock for common models.
Emergency Oven Repair Service Toronto
24/7 Emergency Response: When your oven stops heating, JK Appliances provides emergency repair service throughout the Greater Toronto Area.
Why Choose JK Appliances:
- Gas appliance certified technicians
- All major brands serviced
- 90-day repair warranty
- Transparent pricing
- Emergency availability
Seasonal Oven Care Tips
Winter Preparation:
- Test all functions before holiday cooking
- Clean thoroughly for heavy use period
- Check ventilation for proper operation
- Schedule maintenance if needed
Summer Maintenance:
- Deep clean after reduced usage
- Inspect seals and gaskets
- Check for pest intrusion
- Calibrate temperature settings
Service Areas:
- Downtown Toronto
- North York
- Scarborough
- Etobicoke
- Mississauga
- Brampton
- Markham
- Richmond Hill
- Vaughan
- Ajax
- Oakville
- Burlington
- Milton
Emergency Appliance Repair Toronto
24/7 Emergency Service: When your appliances stop working, JK Appliances offers emergency repair service throughout Toronto and the Greater Toronto Area.
Contact Us:
- Phone: +1 6475608966
- Book Now: Book Now
- Email: services@jkappliancesrepair.com
- Address: 18 Yonge St #3509, Toronto, ON M5E 1Z8
Experiencing oven heating problems in Toronto? Contact JK Appliances at +1 6475608966 for expert diagnosis and repair. We service all major oven brands with guaranteed results and same-day availability.
Expert Tips & Pro Insights
💡 Pro Tip: Regular maintenance can prevent 80% of appliance problems. Follow manufacturer guidelines for cleaning and care.
⚠️ Safety Warning: Always disconnect power before attempting any repairs or inspections. If you smell gas, evacuate immediately and call emergency services.
🔧 Technician Insight: Many issues that seem complex often have simple solutions. Start with basic troubleshooting before assuming the worst.
📞 When to Call a Professional: If you encounter electrical components, gas lines, refrigerant systems, or if basic troubleshooting doesn't resolve the issue, it's time to call an expert.